Back to storefront
Create Stunning Sunlit Floral Nails in 5 Easy Steps - Chrome & Glitz
Chrome & Glitz
Chrome & Glitz

Create Stunning Sunlit Floral Nails in 5 Easy Steps

In the ever-evolving world of nail art trends, we are currently witnessing a beautiful collision between "Quiet Luxury" and "Maximalist Texture." The image before us is the perfect embodiment of this hybrid style: a sophisticated, almond-shaped manicure that balances a soft, milky pink base with the opulence of antique gold 3D accents. This isn't just a manicure; it’s a piece of wearable art. It draws inspiration from Baroque architecture and modern bridal aesthetics, making it one of the most sought-after looks for the upcoming season. Whether you are looking for a manicure tutorial to try at home or you're a professional seeking inspiration for your next client, this detailed guide will break down everything you need to know to achieve this salon-quality finish.

Google Web Story

Watch full 9:16 vertical story look

Watch Story

Shop this look

5 items
Matte Gel Top Coat, 16ml Powder-Resist Matte Finish for Detail Chrome Powder Painting Long Lasting - Create Stunning Sunlit Floral Nails in 5 Easy Steps

Matte Gel Top Coat, 16ml Powder-Resist Matte Finish for Detail Chrome Powder Painting Long Lasting

Shop
Sheer Light Pink Gel Nail Polish, 16ml Jelly Milky White Peach Translucent Color 1352 UV Light Cure Gel Polish - Create Stunning Sunlit Floral Nails in 5 Easy Steps

Sheer Light Pink Gel Nail Polish, 16ml Jelly Milky White Peach Translucent Color 1352 UV Light Cure Gel Polish

Shop
Gold Cat Eye Gel Nail Polish Gold Glassy Shimmer Glitter Holographic Magnetic Gel Polish Soak Off UV Nail Art - Create Stunning Sunlit Floral Nails in 5 Easy Steps

Gold Cat Eye Gel Nail Polish Gold Glassy Shimmer Glitter Holographic Magnetic Gel Polish Soak Off UV Nail Art

Shop
Mirror Gold Chrome Nail Powder Set, 6 Colors | Ultra-Fine Grain-Free Formula, With Applicator, Mica-Based Chrome Pigment - Create Stunning Sunlit Floral Nails in 5 Easy Steps

Mirror Gold Chrome Nail Powder Set, 6 Colors | Ultra-Fine Grain-Free Formula, With Applicator, Mica-Based Chrome Pigment

Shop
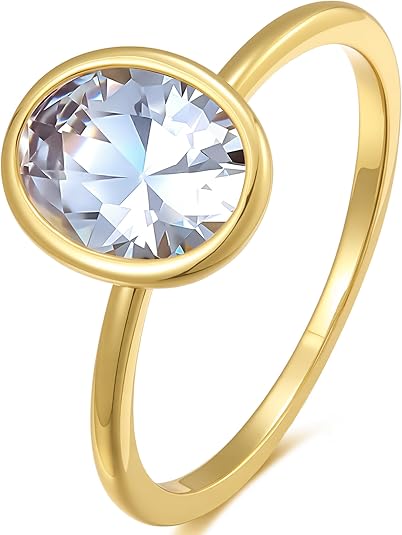
Carat Bezel Set Solitaire Enagement Ring | Oval Cut CZ Promise Simple Bridal Ring - Create Stunning Sunlit Floral Nails in 5 Easy Steps

Carat Bezel Set Solitaire Enagement Ring | Oval Cut CZ Promise Simple Bridal Ring

Shop
As an affiliate partner, I earn from qualifying purchases when you shop through these links.

Step-by-Step Tutorial

Follow these easy steps to recreate this nail art look

Achieving DIY nails that look like they cost $150 at a boutique salon requires patience and a steady hand. Follow these steps to master the design:

Step 1: Prep and Shape

Start with a clean canvas. This design looks best on an almond shape, which elongates the fingers. Gently push back your cuticles, buff the nail surface to remove shine, and apply a dehydrator and primer. This ensures your long-lasting manicure won't lift.

Step 2: The Perfect Base

Apply two thin coats of your sheer blush pink gel. You want the color to be "milky"—not fully opaque. This transparency adds a romantic, soft feel to the overall look. Cure each coat for 60 seconds under a UV/LED lamp.

Step 3: The Asymmetrical French Tips

The thumb, pinky, and index finger feature a modern twist on the French tip. Using your gold painting gel and a liner brush, draw a tilted, swooping line from the middle of the side wall to the tip. Fill it in with gold. This "asymmetrical" look is a major nail art trend right now as it feels more organic and less rigid than a traditional French.

Step 4: The 3D Floral Accents

This is the "wow" factor.

  • For the Ring Finger: Apply three small teardrop-shaped gold charms or use a thick "pudding" gel to sculpt three petals meeting at a center point.
  • For the Middle Finger: This nail is a full-coverage gold accent. After applying the gold base, add a larger 5-petal flower in the center. Use a tiny dotting tool to add a gold bead in the center of the flower for extra dimension.

Step 5: Fine Detailing

Look closely at the image—there is a very thin gold line bordering the pink area on the French-tipped nails. Using your finest brush, trace this line to create a "frame." This small detail is what elevates the design to salon quality.

Step 6: Seal and Protect

Apply a no-wipe top coat. Be careful to "float" the top coat over the 3D charms so you don't lose the definition of the petals. If you used chrome powder, ensure every edge is sealed to prevent chipping. Cure for a final 90 seconds.


Perfect Locations & Occasions

Where to show and flaunt this nail art design

This manicure is a "chameleon"—it fits into high-society events just as easily as it does a casual aesthetic.
First and foremost, this is the ultimate bridal or bridesmaid look. If you are wearing a white or ivory gown, the gold accents tie in beautifully with wedding bands and floral arrangements. It’s romantic enough for a "I do" moment but modern enough to look incredible in close-up photography of the ring.
Secondly, consider this your go-to for professional galas or art gallery openings. As seen in the image, the design pairs exquisitely with a crisp white button-down shirt and gold jewelry. It signals that you are someone who pays attention to detail and appreciates "Quiet Luxury." It’s a power manicure that doesn't need to scream to be noticed.
Finally, this is the perfect vacation manicure for a European summer or a luxury resort stay. Imagine these gold flowers catching the Mediterranean sun while you hold a glass of rosé. The neutral base means it will match every outfit in your suitcase, from linen sets to evening dresses, making it as practical as it is beautiful.

How to Look After Your Manicure: Professional Maintenance Tips


3D nail art requires a bit more love than a standard flat polish. To keep your "Golden Garden" looking fresh for 3+ weeks, follow these pro tips:
* Hydrate the Cuticles: Use a high-quality cuticle oil twice a day. This keeps the skin around your 3D art from looking dry or crusty, which can distract from the design.

* The "Gloves" Rule: When doing dishes or using cleaning chemicals, always wear gloves. Harsh chemicals can dull the metallic finish of the gold and weaken the adhesive holding your 3D charms.

* Avoid "Picking": It can be tempting to fiddle with the raised edges of the gold flowers. Resist the urge! Picking at 3D elements can create a gap where water can enter, leading to bacterial growth or premature lifting.

* Top Coat Refresh: If you notice the shine starting to fade after 10 days, you can lightly buff the surface (avoiding the 3D parts) and apply a fresh layer of top coat to revive the gloss.

Frequently Asked Questions (FAQ)

Tap or click any question to expand details

Conclusion & Styling Summary

Final takeaway tips and styling thoughts

The Golden Garden manicure is more than just a trend; it's a testament to how far DIY nails have come. By combining a minimalist pink base with maximalist gold textures, you create a look that is both timeless and cutting-edge.
To style this look, lean into the "Gold Aesthetic." Pair your nails with stacked gold rings (as shown in the photo) and perhaps a dainty gold watch. Clothing-wise, keep it neutral—whites, creams, and beiges allow the gold work to be the star of the show.
Whether you’re heading to a wedding or just want to feel like royalty during your morning coffee, this 3D floral design is a guaranteed head-turner. Don't be afraid to experiment with the placement of the flowers to make the look uniquely yours!

Value Proposition Summary


By following this guide, you are tapping into the latest nail art trends while ensuring your results are salon quality. We’ve provided a comprehensive manicure tutorial that covers everything from product selection to post-care. Remember, the secret to a great DIY nails experience is using the right tools—check out our "Shop This Look" section to grab the professional-grade supplies used in this design. Stay bold, stay golden, and enjoy your beautiful new manicure!

More looks you'll love
